
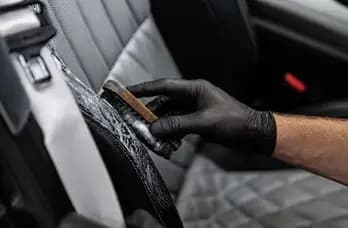
Leather in the car looks beautiful, but it is a natural product that needs attention. With the right approach you keep it looking good for years and even restore worn or damaged leather. This guide brings it all together: first identify your leather type, then clean, feed and repair where needed. You will find all the products you need in the leather cleaning and care category.
Which leather type do you have
The right approach starts with recognising your leather, because not every type tolerates the same products. The quickest test is the water-drop test: place a drop of water on a hidden spot and see if it soaks in. The table below sums up the four main types.
Leather type | How to recognise it | Water-drop test | Approach |
|---|---|---|---|
Pigmented (smooth) | Even colour, smooth and closed, most common in cars | Stays on top or beads off | Regular leather cleaner and conditioner |
Semi-aniline | Natural grain visible, slightly softer | Sits briefly, then soaks in slowly | Mild cleaner and conditioner |
Aniline | Open, natural grain, very soft and warm | Soaks in quickly and darkens | Aniline cream, little water |
Nubuck and suede | Velvety, rough or brushed surface | Soaks in quickly | Separate suede/nubuck approach, no smooth-leather products |
Always do the water-drop test on a hidden spot and with just one or two drops; too much water can itself stain open leather. If the drop soaks in almost immediately and the leather darkens, you have aniline or nubuck and you tread carefully. If the drop stays on top, you have pigmented leather with a closed top layer that tolerates most products well.
From problem to solution
Leather can call for care in many ways: dirty, dull, dry, stiff, discoloured or damaged. Each problem has its own approach. Use this chart to quickly decide which step you need.
Problem | What is going on | What to do |
|---|---|---|
Dirty, stained, greasy | Surface dirt and skin oils in the pores | Clean with a leather cleaner |
Dull or greyed | Dirt, or too much product residue | Clean thoroughly first, then feed thinly |
Dry, feels rough | Loss of oils through sun and use | Feed with a conditioner |
Stiff and hard | Advanced drying out | Softener in thin layers, then conditioner |
Discoloured or faded | UV and wear damage to the colour layer | Recolour with leather paint, then a top coat |
Cracks or hairline cracks | Chronic drying out, often the sunny side | Fill with filler, then colour and seal |
Tear or hole | Mechanical damage or wear | Repair kit: glue, fill, colour, finish |
How to tackle it step by step
Clean. Clean the leather with a suitable leather cleaner and let it dry.
Assess. Determine the leather type and its state: only dull and dry, or also stiff, discoloured or damaged?
Treat. Feed healthy leather, restore stiff or damaged leather with softener, repair kit or leather paint, and finish recoloured leather with a top coat.
Protect. Keep the leather topped up with regular care and act quickly on spills so they do not soak in.
Always start with cleaning
Every leather treatment starts with a clean surface. Skin oils, dust and hand cream settle into the pores and leave the leather dull and greyed. Apply care over dirt and you seal it in. So clean first with a mild leather cleaner, and use a stronger cleaner on heavily soiled leather. How to do that safely is in the guide cleaning leather with Leather Expert Leather Cleaner.
Feed and keep supple
Clean leather then wants to be fed. A conditioner brings back the natural oils and waxes and keeps the leather supple; for that read the guide on the Leather Expert Leather Conditioner. If your leather is already dried out and stiff, you need more than upkeep: a softener makes hardened leather flexible again, explained in the guide making stiff leather supple. If you have open, unpigmented aniline leather, choose the approach in the guide caring for aniline leather.
Restore and recolour
You do not write off worn or damaged leather. Cracks, holes and scratches you fill and repair with a repair kit, explained step by step in the guide repairing leather with the repair kit. If the colour has worn away, for example on the seat bolster or the gear lever, you recolour with leather paint; how that works is in the guide dyeing leather with Leather Colourant.
See a full restoration in action
In this official video Leather Expert shows how a worn leather car seat is cleaned, repaired, recoloured and sealed. A clear overview of how the steps flow into each other.
How often to maintain leather
How often you clean and feed leather depends mostly on use and sun. A daily-driven car you clean lightly every one to three months and feed a few times a year. If the car sits in the sun a lot or gets heavy use, do it more often. More important than a fixed schedule is the rule of thumb: clean as soon as the leather looks dirty, and feed before it feels dry. That way you stay ahead of drying out and cracking instead of repairing them afterwards.
Common mistakes to avoid
Caring over dirty leather. You seal the dirt in; always clean first.
Using dish soap or saddle soap. They are too alkaline for the slightly acidic leather and attack its oil layer.
Feeding too much or too often. Excess product leaves a greasy, dull haze and can make the leather more brittle over time.
Treating suede or nubuck as smooth leather. Oil- and wax-based products clog the nap irreversibly.
Recolouring without a top coat. Without a finishing layer the new colour wears off again quickly.
Other brands offer good leather care too. Compare, for example, the approach in the guide on Koch Chemie LS Leather Star and Colourlock Mild Leather Cleaner to see what suits your leather best.