
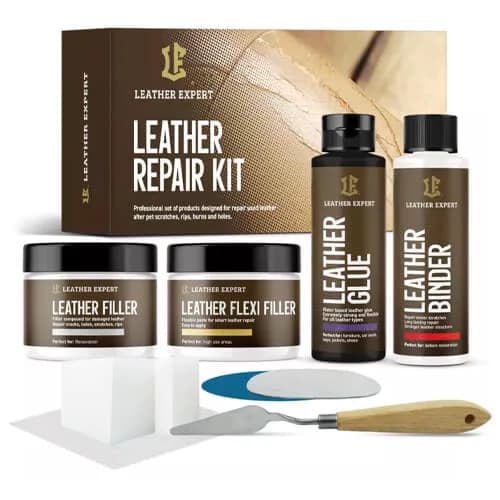
The Leather Expert Leather Repair Kit is a complete set to repair cracks, holes, scratches and cuts in smooth leather. The set holds binder, glue, filler and flexi filler, degreasing wipes, a spatula, sponges, sandpaper and even a leather and cloth patch to back larger tears. You restore the structure first, then fill the damage, touch up the colour and finish. You will find the Leather Expert Leather Repair Kit in the shop.
What is in the set
The binder binds weakened, loose leather fibres so the leather is strong enough to repair again. The glue fixes cracks, with the included patch as backing for larger damage. The filler fills hard damage that you then sand; the flexi filler fills shallow damage in areas that keep flexing. You buy the colour and finishing step separately.
Which Leather Expert kit do you need
Leather Expert has several sets that partly share the same products. This repair kit is the only one with binder, glue and the full filler and flexi filler, so it is the right choice for real cracks and holes. The table below shows what is in each set.
Contents | Repair Kit | Steering Restoration | Steering Care & Repair | Strong Care |
|---|---|---|---|---|
- | - | 50 ml | - | |
Strong Cleaner | - | - | - | 200 ml |
Preparer | - | 50 ml | 50 ml | - |
Alcohol Cleaner | - | 50 ml | 50 ml | - |
Binder | 50 ml | - | - | - |
Glue | 50 ml | - | - | - |
Filler | 25 ml | - | 5 ml | - |
Flexi Filler | 25 ml | - | - | - |
Colourant (paint) | - | 50 ml | 50 ml | - |
Top Coat | - | 50 ml | 50 ml | - |
Conditioner | - | - | 50 ml | 250 ml |
How to repair step by step
Clean. Clean the leather around the damage with a leather cleaner and let it dry.
Degrease. Wipe the spot with the included degreasing wipe so everything adheres well.
Restore the structure. Fix a crack with the glue and treat weakened, fuzzy fibres with the binder; use the patch as backing for larger damage.
Fill. Apply filler with the spatula for hard holes, or flexi filler for shallow damage in flexing areas, in thin layers and let it dry.
Sand and colour. Sand the dried filler flush (not the flexi filler) and touch up with a colourant in the right shade.
Finish. Seal with a top coat and then leave the leather to rest for about five days before you clean or condition it again.
Work at room temperature and build up both the filler and the colour in several thin layers; thin and patient gives a more even result than one thick layer at once.
See a full seat repair
In this official Leather Expert video you see how a worn leather car seat is restored from cleaning to finish. Handy to see the order and pace of the work before you start yourself.
Which leather it suits
The repair kit is for natural, smooth leather. The degreasing wipes are explicitly not for suede and nubuck, so you do not treat those materials with it. To go deeper into filling itself, read the guide filling cracks and holes with Leather Expert Filler, or see the big picture in the guide cleaning, conditioning and repairing leather.